Figuring out how to fix a dishwasher that’s on the fritz can be a major headache for any Austin homeowner. Before you assume the worst and start looking at expensive replacements, what if you could get expert, personalized advice without the high cost of a service call? For just $20, HomeWise Services’ concierge service connects you directly with a master technician to troubleshoot your issue, recommend the right parts, and even schedule a white-glove repair if needed.
Tired of guessing? Let’s explore some common dishwasher problems and how you can solve them, whether you’re a DIY enthusiast or prefer professional guidance from a trusted Austin expert.
Your First Steps in Dishwasher Troubleshooting
When your dishwasher suddenly quits, your first instinct might be to panic. But hold off on calling for an expensive repair just yet. Let’s walk through the foundational checks that often resolve the issue without any technical skills. These steps are all about ruling out the simple culprits first, saving you time and money.
It’s surprising how often a major “breakdown” is just a minor electronic hiccup. Think of it like rebooting a frozen computer—sometimes, all your dishwasher needs is a fresh start. Getting these basics right could easily save you the cost and hassle of a service call.
Check the Power and Control Panel
First things first: is the machine actually getting power?
Go to your home’s main circuit breaker panel and find the switch for your dishwasher (it might be labeled “Kitchen” or “Dishwasher”). Firmly flip it all the way off, wait a full 60 seconds, and then switch it back on. This doesn’t just restore power; it resets the dishwasher’s internal computer, which can clear temporary glitches or error codes that have locked up the control panel.
If that doesn’t work, confirm the outlet itself has power. If the plug is accessible, try plugging in a small lamp or phone charger to see if it works.
Inspect the Water Supply
No water means no wash cycle. The next logical place to check is the water supply line.
You’ll typically find the shut-off valve under your kitchen sink. Make sure the handle is turned completely to the “on” position, usually parallel with the water pipe. It’s not uncommon for these valves to get bumped or accidentally turned, restricting water flow.
Also, take a moment to ensure your home’s hot water heater is functioning correctly. Most dishwashers use your hot water line to clean effectively, and with Austin’s varying water temperatures, ensuring a hot supply is key.
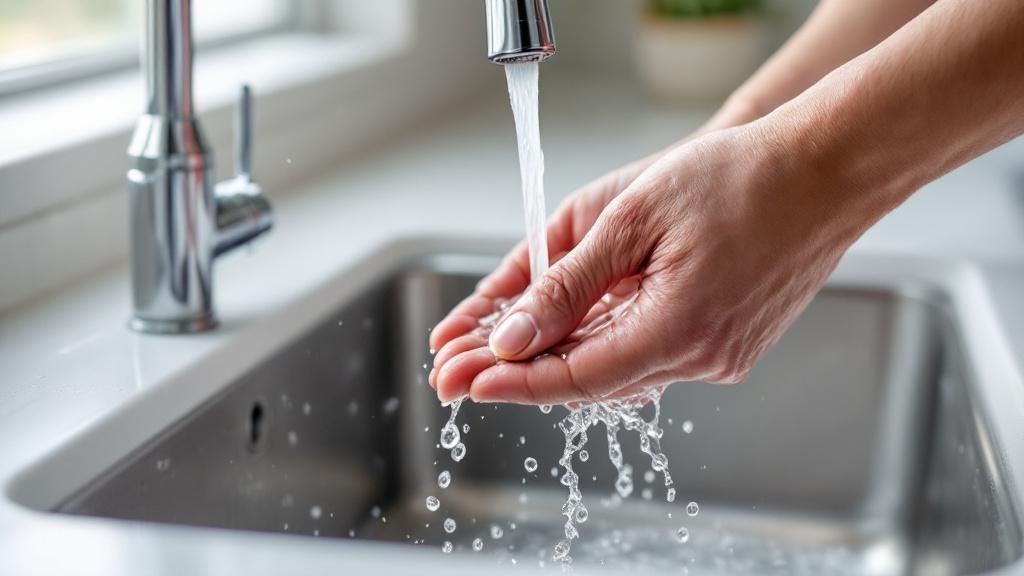
Pro Tip: For better cleaning results, run the hot water at your kitchen sink for a minute before starting the dishwasher. This purges any cold water from the line, ensuring your machine fills with properly heated water right from the start.
Solving Why Your Dishes Are Still Dirty
It’s one of the most frustrating kitchen moments: you open the dishwasher expecting sparkling clean dishes, only to find them covered in grime and food particles. It’s a clear sign something is wrong. Before your mind jumps to a costly replacement, take a breath. From my experience helping Austin homeowners, 90% of cleaning issues come down to a few surprisingly simple things you can fix yourself.
The great news is that you can likely get your machine back in top shape in less than an hour. You don’t need to be a pro—just follow these steps to troubleshoot your dishwasher.
Clean the Dishwasher Filter
First things first: check the filter. If your dishes are coming out gritty, this is almost always the culprit. The filter sits at the bottom of the tub, usually under the lower spray arm, and its job is to trap food debris so it doesn’t get re-deposited onto your dishes.
When it gets clogged, water can’t circulate properly, and dirty, food-filled water just gets sprayed around. Cleaning it is the single most effective thing you can do for your dishwasher’s performance.
- Locate and Remove: Look for a cylindrical piece at the bottom of the dishwasher tub. It usually twists to unlock—look for arrows. Lift it out. Many models also have a flat mesh screen underneath that you’ll want to remove as well.
- Give It a Good Scrub: Rinse both parts under your kitchen sink with warm water. Use a soft brush (an old toothbrush is perfect) and dish soap to get rid of any stubborn grease or caked-on gunk.
- Put It Back Securely: Once clean, place the filter back in and twist it until it locks firmly into place. If it’s not seated correctly, it won’t work and could even cause damage.
Check and Unclog the Spray Arms
With a clean filter, the next place to look is the spray arms. These are the spinning wands that blast food off your dishes with high-pressure water jets. If the small holes on these arms get clogged, the water pressure drops, creating “dead zones” inside the dishwasher where nothing gets cleaned.
Give them a quick spin by hand; they should rotate freely. Then, look closely at the jet holes. You’ll probably spot bits of food, hard water minerals, or even small seeds blocking them.
Expert Tip: For a thorough cleaning, I recommend removing the spray arms. Most just unscrew or have a simple clip. Use a toothpick or a paperclip to poke the debris out of each hole. To combat Austin’s hard water, soak the arms in a bowl of white vinegar for 30 minutes. The mineral buildup will dissolve right off.
If a spray arm is cracked or won’t spin freely, it’s time for a new one. A replacement part like a GE Spray Arm from RepairClinic is typically an easy, inexpensive swap that will immediately restore your dishwasher’s cleaning power.
Tackling Dishwasher Leaks and Drainage Problems
There’s nothing quite like the sinking feeling of seeing a puddle spreading across your kitchen floor. It’s the universal sign of a dishwasher in distress, usually from a leak or a drainage failure. Before you start thinking about the cost of a new appliance, let’s walk through the most common culprits. I’ve found that most of these issues are surprisingly easy to fix yourself.
Finding and Fixing Leaks
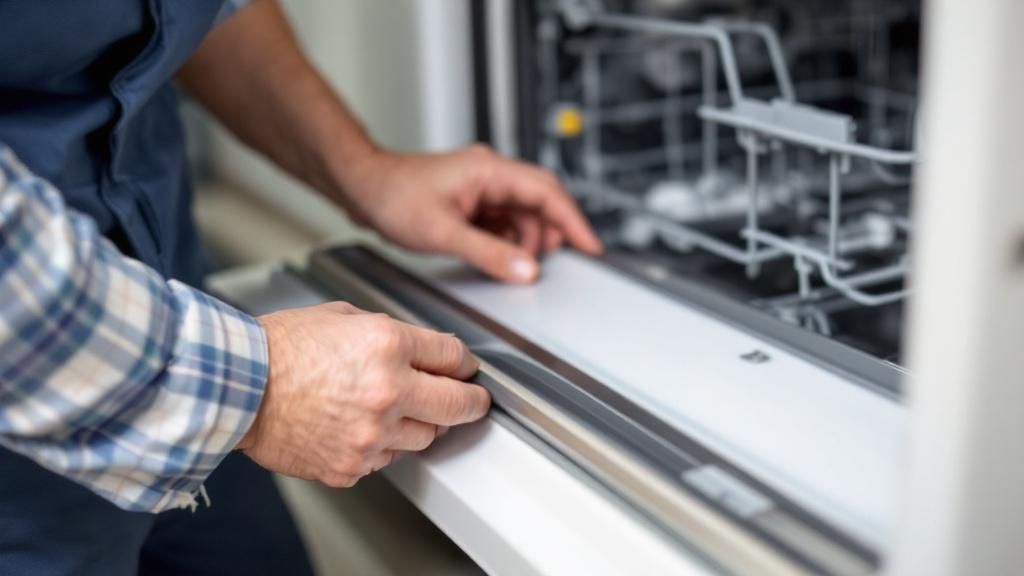
The first, and most obvious, place to start your leak hunt is the dishwasher door. That rubber seal running along the edge, known as the door gasket, is your primary suspect. Over the years, it gets caked with grime and food bits, or it can simply become brittle and cracked.
Take a damp cloth and give it a good, gentle wipe-down. As you clean, feel its texture and look closely for any tears, splits, or areas that feel hard and inflexible. If it’s anything but soft and pliable, it has lost its seal and needs to be replaced.
If the gasket is in good shape, your next move is to grab a flashlight and peek behind and under the unit. Your dishwasher has two key lifelines: the inlet hose that brings clean water in and the drain hose that pumps the dirty water out. Check the connection points—both at the back of the dishwasher and where they meet the plumbing under your sink. The constant vibration of the machine can slowly work these connections loose. Often, a simple tightening with a pair of pliers is all it takes to stop the drip.
This visual breakdown shows just how common seal-related issues are compared to other problems.
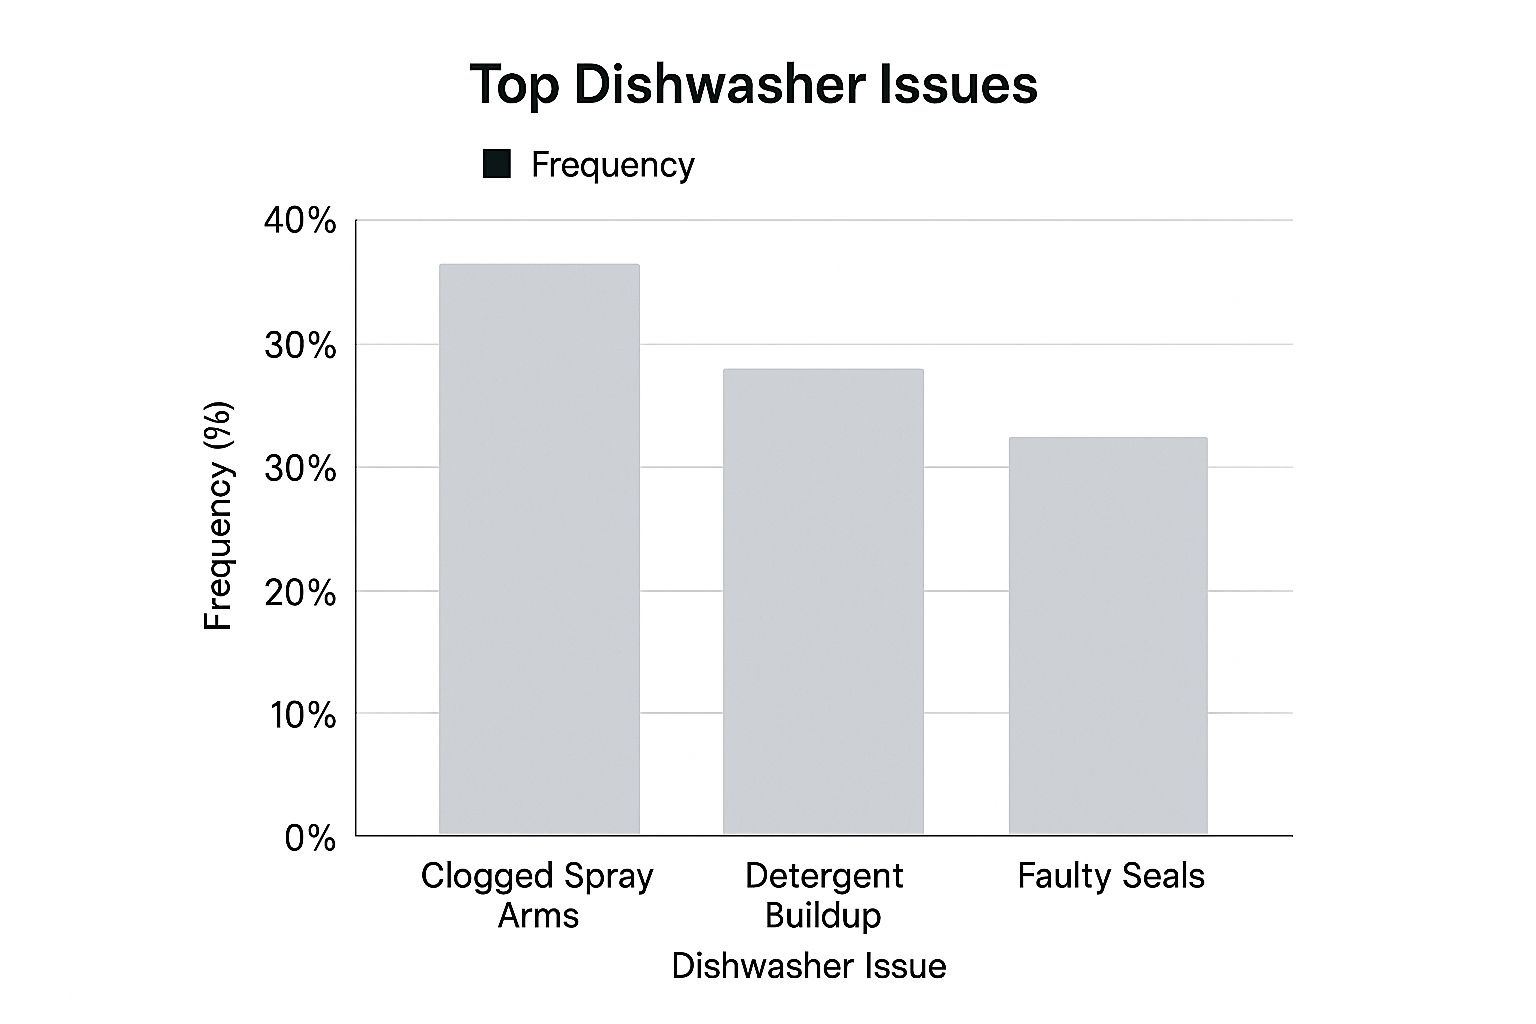
As you can see, faulty seals are responsible for a significant 25% of common dishwasher troubles, which is why I always recommend checking them first.
To help you pinpoint the source of your leak even faster, I’ve put together this quick-reference table. It matches the location of the water with the most likely cause and solution.
Common Dishwasher Leak Sources and Fixes
| Leak Location | Common Cause | DIY Fix or Professional Help | Recommended Action |
|---|---|---|---|
| Front Door | Worn or dirty door gasket; cracked inner door panel. | DIY | Clean the gasket thoroughly. If it’s cracked or hard, replace it. |
| Under the Unit | Loose water inlet or drain hose connection. | DIY | Use pliers to gently tighten the hose clamps at both ends. |
| Sides of the Unit | Over-sudsing from the wrong detergent; crack in the tub. | DIY/Pro | Use only dishwasher-specific detergent. A cracked tub requires a professional. |
| From the Air Gap (on sink) | Clog in the drain line between the air gap and the garbage disposal. | DIY | Disconnect the hose and clear the obstruction. |
This table should help you narrow down the possibilities quickly, but remember to always turn off the power at the circuit breaker before you start poking around with tools.
What to Do When Your Dishwasher Won’t Drain
If you open the door to find a pool of murky water at the bottom, you’re dealing with a drainage issue, not a leak. This almost always points to a clog somewhere in the drain path.
The most likely blockage is in the drain hose itself or right where it connects to your garbage disposal. After disconnecting the power, place a bucket under the hose connection and detach it. You can usually clear out a simple food clog by running water through the hose into the bucket.
My Key Advice: Always start with the simplest fix first. A clean door seal, tight hose connections, and a clear drain hose will solve the vast majority of dishwasher leak and drainage problems without costing you a dime for a service call. If you’ve worked through these steps and the water is still there, it could point to a more serious issue like a failing pump, and that’s when it’s time to call in a pro.
When It’s Time to Call an Expert for Your Dishwasher Repair
There’s a real satisfaction in fixing something yourself—it saves money and you learn something new. But every DIYer needs to know when to put the tools down. Pushing your luck on a complex repair can quickly turn a manageable fix into a full-blown, expensive disaster.
Frankly, some dishwasher problems are just too risky for most homeowners. Without the right training and diagnostic tools, you could easily cause more damage, create an electrical hazard, or even flood your Austin kitchen. Knowing your limits is the smartest tool you have.
Situations That Demand a Pro
If your dishwasher is completely dead and you’ve already checked the circuit breaker, it’s time to stop. You’re likely dealing with a significant electrical fault, like a fried main control board, a blown internal fuse, or a wiring short. These aren’t simple part swaps; they require a deep understanding of appliance electronics and safety protocols.
Loud grinding or humming noises are another major red flag. This often points to a failing motor or circulation pump—the heart of your machine. Replacing these components is a complex, labor-intensive job. One wrong move and you could damage the new part or another system connected to it.
The Smartest Move: Don’t let a $300 repair turn into a $1,000 appliance replacement. If you’ve tried the basic troubleshooting and are still stumped, or the issue involves the motor or control panel, calling a pro isn’t giving up. It’s making a smart financial decision.
Your Go-To Resource for Tricky Repairs
This is exactly where our HomeWise Services’ $20 concierge service becomes your best asset. Before you spend hours guessing or risk making the problem worse, you can connect directly with a master technician right here in Austin.
For a flat $20 fee, a HomeWise Services expert will:
- Help you accurately diagnose the complex issue over the phone.
- Confirm the exact replacement part you need, with links to trusted suppliers like Sears PartsDirect and RepairClinic.
- Give you an honest, clear assessment of whether it’s a job you can tackle yourself.
- If a service call is the best route, we’ll schedule a white-glove appliance repair in Austin, TX with one of our trusted local technicians.
If you just need a quick second opinion, you can always get expert help from a verified appliance pro on JustAnswer. It’s a great way to get advice via text, so you can figure out your next steps with confidence.
Simple Maintenance to Prevent Future Breakdowns
The old saying “an ounce of prevention is worth a pound of cure” couldn’t be more true for dishwashers. Taking just a few minutes each month for some simple upkeep can save you from the headache of a machine that suddenly leaks, stops cleaning, or refuses to start altogether.
For those of us in Austin, a basic maintenance routine is the single best way to fend off the most common appliance failures. This isn’t about becoming a repair technician; it’s about forming a few easy habits that will dramatically extend your dishwasher’s life and keep it running like new.
Your Monthly Maintenance Checklist
I always tell people to set a recurring reminder on their phone for these tasks. It’s the consistency that really stops the slow, sneaky buildup that eventually causes big problems.
- Clean the Filter: This is non-negotiable. As we’ve already covered, a gunked-up filter is the number one reason for dishes coming out dirty. Just twist it out, give it a good scrub with a soft brush and some warm, soapy water, and pop it back in.
- Wipe Down the Door Gasket: Grab a damp cloth and wipe down the rubber seal that runs around the entire door opening. Food bits get trapped here, and over time they can degrade the seal and cause annoying leaks.
- Check the Spray Arms: Make sure the spray arms can spin freely. Then, take a quick look at the little holes where the water comes out. If you see any blockages, a toothpick or a paperclip is perfect for clearing them out.
Combatting Austin’s Hard Water
Anyone living in Austin knows about our hard water. It’s packed with minerals like calcium and magnesium that leave behind that chalky, white film—limescale—all over your dishwasher’s interior and, more importantly, its heating element. This mineral buildup makes your machine work much harder than it should and can lead to parts failing prematurely.
The best way to fight back is to run a special cleaning cycle once a month.
Expert Tip: My go-to method is simple and cheap. Just pour one cup of plain white vinegar into a dishwasher-safe bowl, place it on the top rack, and run the machine empty on its hottest cycle. The acid in the vinegar does an amazing job of dissolving all those mineral deposits.
A little bit of effort now truly does prevent a world of frustration later. It’s a small investment in your appliance’s health—and your own peace of mind.
Your Top Dishwasher Repair Questions Answered
When your dishwasher starts acting up, a flood of questions usually follows. After years of providing appliance repair in Austin, I’ve heard pretty much every question in the book. Here are some quick, no-nonsense answers to the ones that pop up most often.
Why Are My Glasses Covered in a White Film?
That cloudy film on your glassware is a classic sign of hard water, something we have in spades here in Austin. The minerals in the water are what’s left behind when the water evaporates. Your first move should be to grab a good rinse aid and use detergent specifically designed for hard water. If the problem persists, the heating element might be failing, as hot water is needed to dissolve detergent properly.
Expert Insight: This is a perfect time to use our concierge service. For just $20, we can help you figure out if it’s a simple hard water fix or something more serious like the heating element. It’s a small price to pay to avoid guessing.
Can I Actually Replace Dishwasher Parts Myself?
You bet. Many common dishwasher parts are surprisingly simple to swap out. Things like spray arms, filters, and door gaskets are totally doable for a handy homeowner. We often point people to reliable suppliers like RepairClinic and Parts Select because they make it easy to find the exact part for your model. For electrical components like pumps and motors, I always recommend calling a pro. Our $20 concierge service is a great way to get a quick expert opinion on whether your repair is a safe DIY project.
What’s a Dishwasher Repair Going to Cost Me in Austin?
Honestly, it’s all over the map. A simple DIY fix might only cost you $20 to $50 for the part. If you call in a pro, you’re usually looking at a $100 to $150 diagnostic fee just for them to walk in the door, with final bills climbing to $250 to $400. This is exactly why we started the HomeWise Services concierge program. For a flat $20, we’ll diagnose the problem with you and give you a realistic cost estimate before you’re on the hook for a big repair bill.
Should I Fix My Old Dishwasher or Just Buy a New One?
The best advice I can give is to follow the 50% rule. If a repair is going to cost more than half the price of a brand-new, comparable dishwasher, it’s almost always smarter to replace it. Age is another huge factor. If your dishwasher is over 8-10 years old and needs a major repair, put that money toward a new, more efficient model. For advice tailored to your machine, our concierge service or an expert from a site like JustAnswer can help you weigh the options.
Ready to stop guessing and get a solid plan for your dishwasher? For just $20, the HomeWise Services concierge team will walk you through troubleshooting, find the exact parts you need, and even help schedule a white-glove repair service if it comes to that. Get expert help now by visiting https://homewiseservices.biz and book your concierge call today! A portion of our proceeds proudly supports the Texas Amputee Golf and Wellness Foundation.
Article created using Outrank

Leave a comment