
Quick Answer: Most epoxy problems start under the epoxy. A professional coatings job begins with prep: remove the factory finish, sand the surface rough, vacuum and wipe it really clean, test concrete for moisture, seal porous wood before the flood coat, and only pour on a surface that’s dry and structurally sound. Skip a step and the epoxy can bubble, crater or fail to bond, no matter how good the product is.
I’m Master Tech Scott with HomeWise Services in San Antonio, and I’m a Leggari Certified Installer. Here’s a real example from one of our own jobs, plus what the manufacturers say good prep looks like.
📱 Not sure what your surface needs? Ask the HomeWise app: homewiseservices.grok.me. Tell it what your countertop or floor is made of and what you’re hoping for.
⚠️ Safety first: Sanding throws fine dust, so use a sander hooked to a vacuum and wear a mask. Leggari recommends rubber gloves, a respirator and safety glasses when mixing or handling its epoxy, and its SDS calls for good ventilation. Wipe-down solvents can be flammable, so follow the label and keep them away from flames. If you see water damage, swelling or soft spots, fix that first. Epoxy isn’t a repair.
What happened to our butcher-block island?
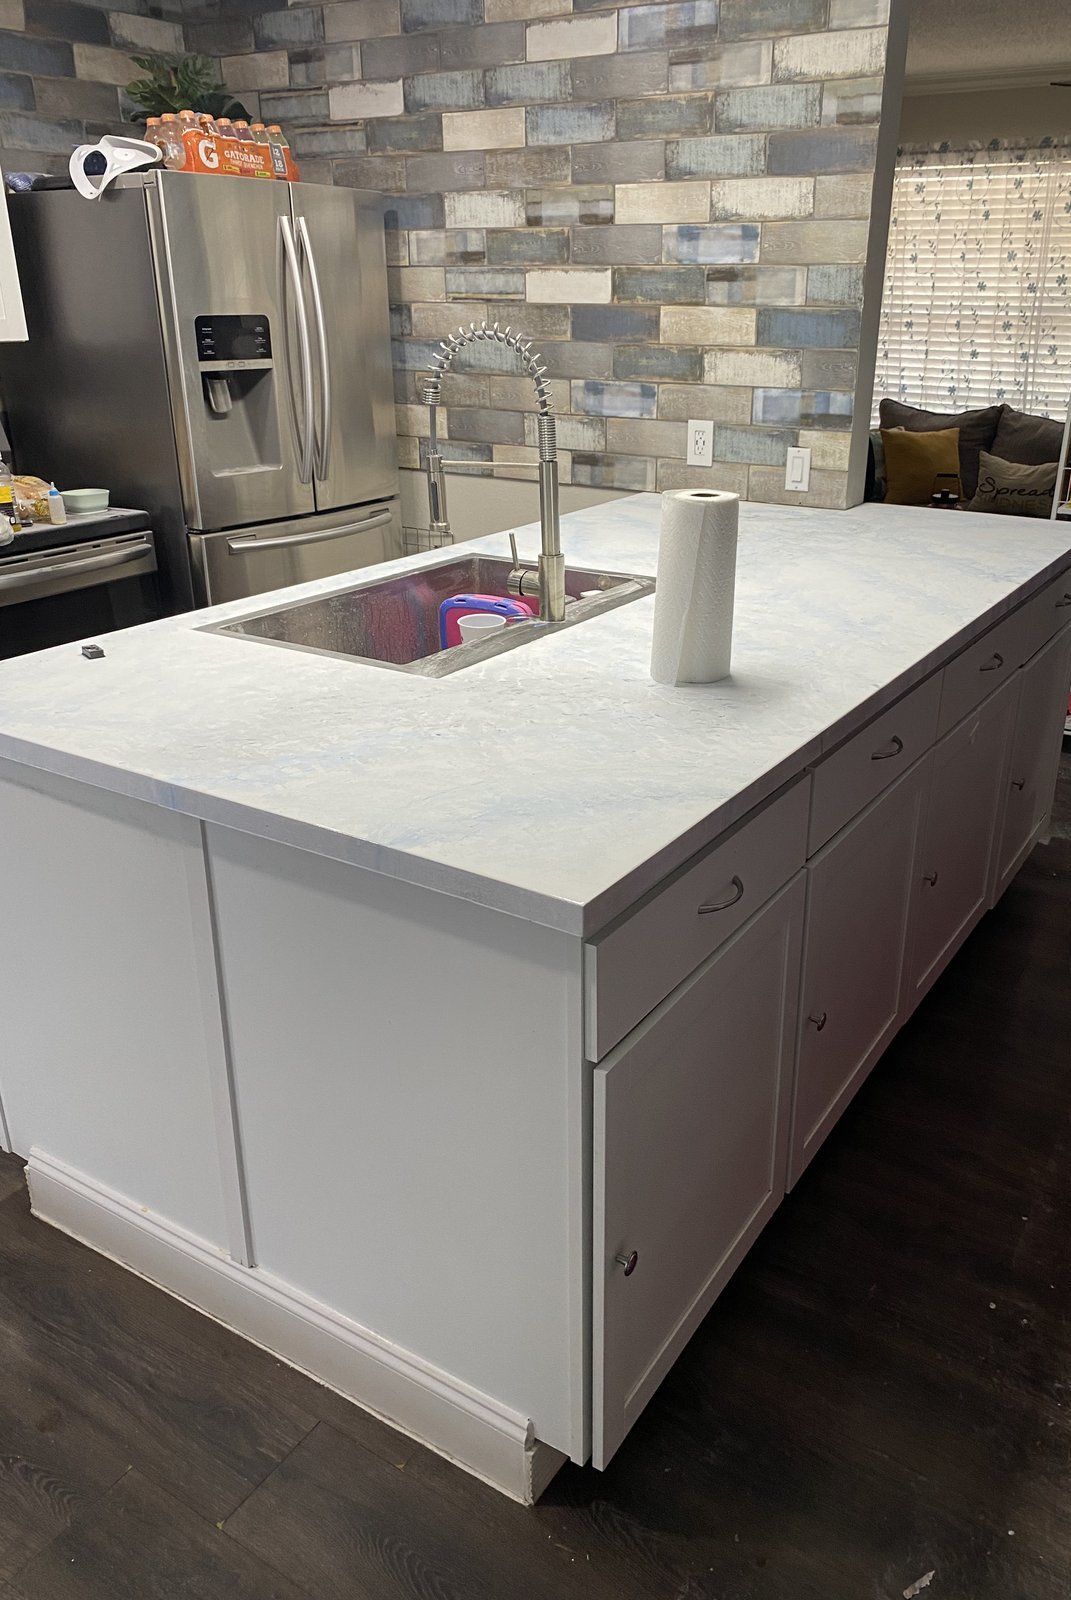
This kitchen island is Lone Star Decorative white epoxy with blue and silver metallic highlights, poured over two joined butcher block countertops. The wood was holding moisture. The next day, that moisture outgassed into the epoxy, and the pour bubbled up and cratered.
The fix was to sand it down and seal it to a matte finish. That’s the finish you see in the photos and in the Short. It was a good reminder: on wood, what’s inside the substrate matters as much as what goes on top.

What does good epoxy surface prep look like?
Leggari’s video, How To Prep Countertops For Epoxy Countertop Install, sums it up well. Whether you’re going over laminate, granite, tile or custom wood tops, “the goal is the same”: remove any factory finish and create a rough, semi-rough surface the primer can bond to. Their video description says most surfaces just need to be sanded (80-100 grit) and wiped clean. Granite and marble need the sealer removed, and tile grout lines get filled and sanded smooth.
Leggari’s video also shows these steps:
- Check that the counters are level both ways. Don’t assume whoever installed them did.
- Patch seams, gaps and nail holes so resin can’t run through.
- Sand off the factory finish with a sander hooked to a vacuum.
- Vacuum, then wipe with a damp (not wet) rag until your hand comes away clean. The cleaner the top, the less debris ends up in the epoxy.
Why do wood and concrete need extra steps?
Wood and concrete are porous. They can hold air and moisture, and that’s what comes up into a fresh pour.
- Concrete: Leggari’s floor guide starts with a moisture test, then a vapor barrier if needed. Its product pages call hidden moisture “one of the leading causes of coating failures, delamination, and costly callbacks.” Leggari’s Vapor Barrier data sheet references the ASTM F1869 and ASTM F2170 moisture test methods.
- Wood: TotalBoat’s TableTop Epoxy data sheet says to always apply a thin seal coat to wood and other porous surfaces before the flood coat. The seal coat creates an air-tight barrier so bubbles don’t rise up through the curing epoxy. System Three adds that air expanding inside the substrate causes bubbles, so don’t coat a surface that’s warming in the sun.
Can you coat a surface that just got wet?
Not until it’s completely dry. TotalBoat says surfaces must be clean, dry and free of contamination, including moisture. Leggari’s floor guide primes only after the floor is completely dry, and its Vapor Barrier data sheet says not to install if rain is forecast during the install. In San Antonio, that means watching the weather for patios, garages and anything near an open door.
Why prep is what makes it professional
Anyone can pour epoxy. A professional job is everything before the pour: testing, sanding, cleaning, sealing, and waiting when the surface isn’t ready. Leggari’s data sheet is clear that the substrate “must be structurally sound” and any necessary repairs done first.
FAQ
Why did my epoxy bubble on wood?
Usually air or moisture coming out of the wood into the curing epoxy. Manufacturers like TotalBoat and System Three recommend a thin seal coat on porous wood before the flood coat.
Can epoxy go over granite or laminate?
Yes. Leggari’s system is designed for laminate/Formica, stone, tile, wood and concrete, as long as the finish or sealer is removed and the surface is sanded and cleaned.
Will epoxy fix a cracked or water-damaged countertop?
No. The surface must be structurally sound, with repairs done first. Epoxy isn’t a repair.
How much is a coatings consult?
$100 for an in-person consult on weekday mornings, and the $100 is credited toward the job if you hire us.
Thinking about epoxy for your countertop or floor?
📱 Ask the HomeWise app first: https://homewiseservices.grok.me
📅 Book your $100 coatings consult: https://squareup.com/appointments/book/LP9TG4BA7WG6C
Sources: Leggari: How To Prep Countertops For Epoxy Countertop Install (YouTube) · Leggari Metallic Epoxy TDS · Leggari Vapor Barrier TDS · Leggari: Ultimate DIY Epoxy Floor Guide · Leggari Moisture Guard · TotalBoat TableTop Epoxy TDS · System Three: Avoiding bubbles in epoxy
Scott, HomeWise Services, (210) 580-6670
20710 Huebner Rd, San Antonio, TX 78258. Serving San Antonio and the area within 30 miles.
This article is general information, not a professional assessment.

Leave a Reply